A Step-by-Step Guide to Roof Installation in Bradenton FL Homes
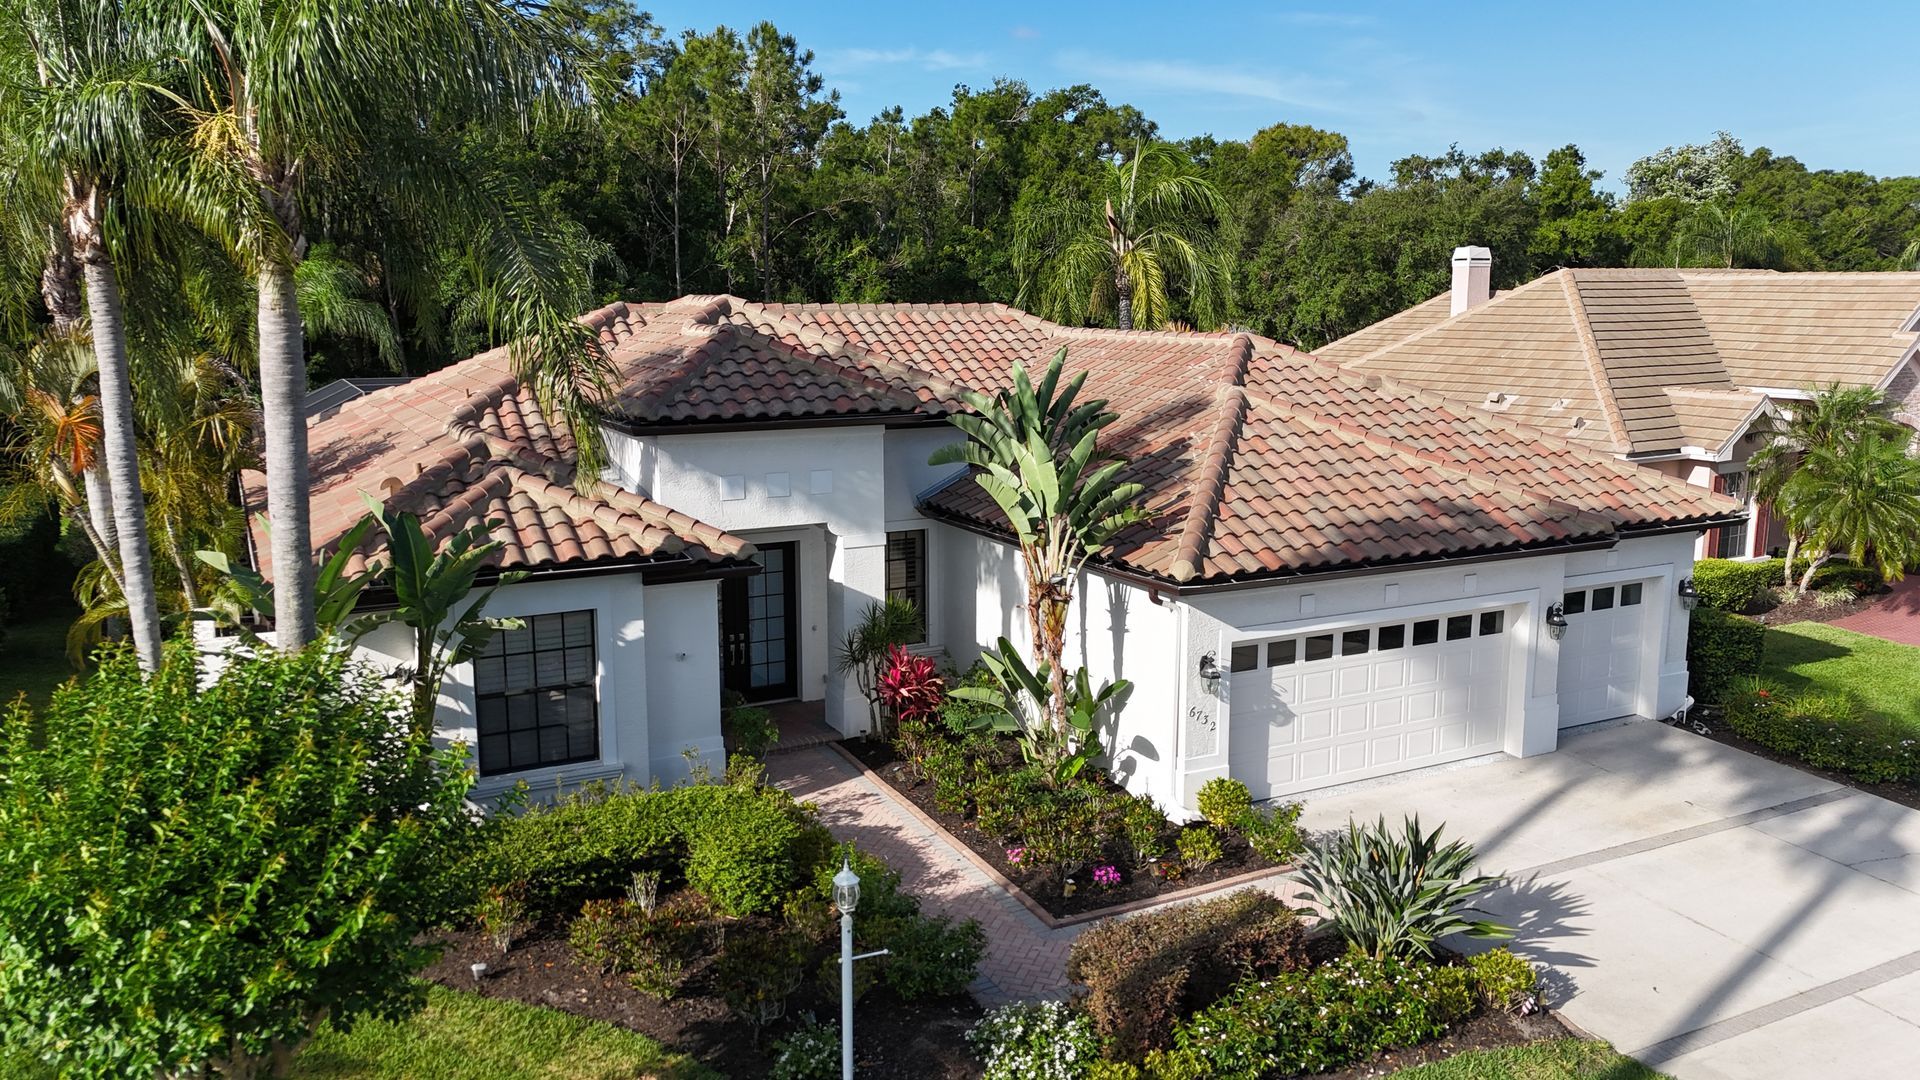
When you decide it’s time for a new roof on your Bradenton home, you’re making a major investment — one that can protect your property for decades if done right. Roof installation in Florida demands more than simply laying down new material. With salty coastal air, hurricane‑strength winds, heavy seasonal rain, and intense heat, the process must be meticulous, code‑compliant, and built for long‑term durability.
This extended guide walks you through each step of a properly installed residential roof in Bradenton — from early planning to final inspection — so you know exactly what’s involved, why each step matters, and what you should expect as a homeowner.
Why Roof Installation in Bradenton Requires Extra Care
Bradenton’s location along Florida’s Gulf Coast means homes are subject to a unique blend of environmental stresses. Salt air can corrode metal components, accelerate rust, and weaken hardware. Storms and hurricanes can challenge the wind‑resistance and structural integrity of roofing systems. Torrential rain and humidity push the need for strong waterproofing and well‑sealed underlayment. Intense sunlight and heat can degrade materials over time, while thermal expansion and contraction stress seams and decking.
Because of these demands, replacing or installing a roof in Bradenton cannot be treated like a simple cosmetic upgrade. It must be approached as constructing a complex, multi‑layer protective system — starting from the very foundation of the roof deck. Skipping or shortcutting any step can undermine the entire roof’s reliability, resulting in leaks, structural damage, or premature failure.
That’s why, when you hire a qualified, experienced roofing crew, you should expect a well‑structured installation proces — one that addresses everything from decking inspection and underlayment to ventilation, flashing, and final cleanup.
Pre‑Installation Phase: Planning, Permits, and Preparation
Before any hammer hits a nail, the project begins with careful planning and preparation. This phase lays the groundwork for a successful installation and compliance with Florida’s building codes.
First, an experienced roofing contractor will perform a thorough inspection of your existing roof and attic structure. They’ll assess the roof deck (the plywood or wood sheathing beneath the existing covering), check for signs of water damage, wood rot, structural defects, or previous patchwork. This evaluation determines whether the underlying structure is sound or whether repairs or reinforcement are needed before proceeding.
Next, the scope of work is drawn up. This includes which materials will be used (underlayment type, roofing material, flashing), how existing penetrations like vents, chimneys, and skylights will be addressed, whether roof decking needs reinforcement, and how ventilation will be handled. Because Bradenton is vulnerable to hurricanes and heavy storms, the plan often includes upgrades tailored for wind‑resistance, corrosion‑resistant hardware, sealed roof deck membranes, and code‑compliant underlayment.
Obtaining the proper permits from the local building department is also essential. Florida’s building code has specific requirements for wind load, waterproofing, and structural integrity — especially on re‑roof projects. Skipping the permit process or failing to meet code requirements can lead to liability issues, insurance complications, or failure in future inspections.
Finally, before work begins, homeowners are typically advised to prepare the property: move cars away from the house, clear patio furniture, cover landscaping, secure fragile items, and inform family members about potential loud noise and disruption.
Day One: Tear-Off of the Old Roof and Deck Inspection
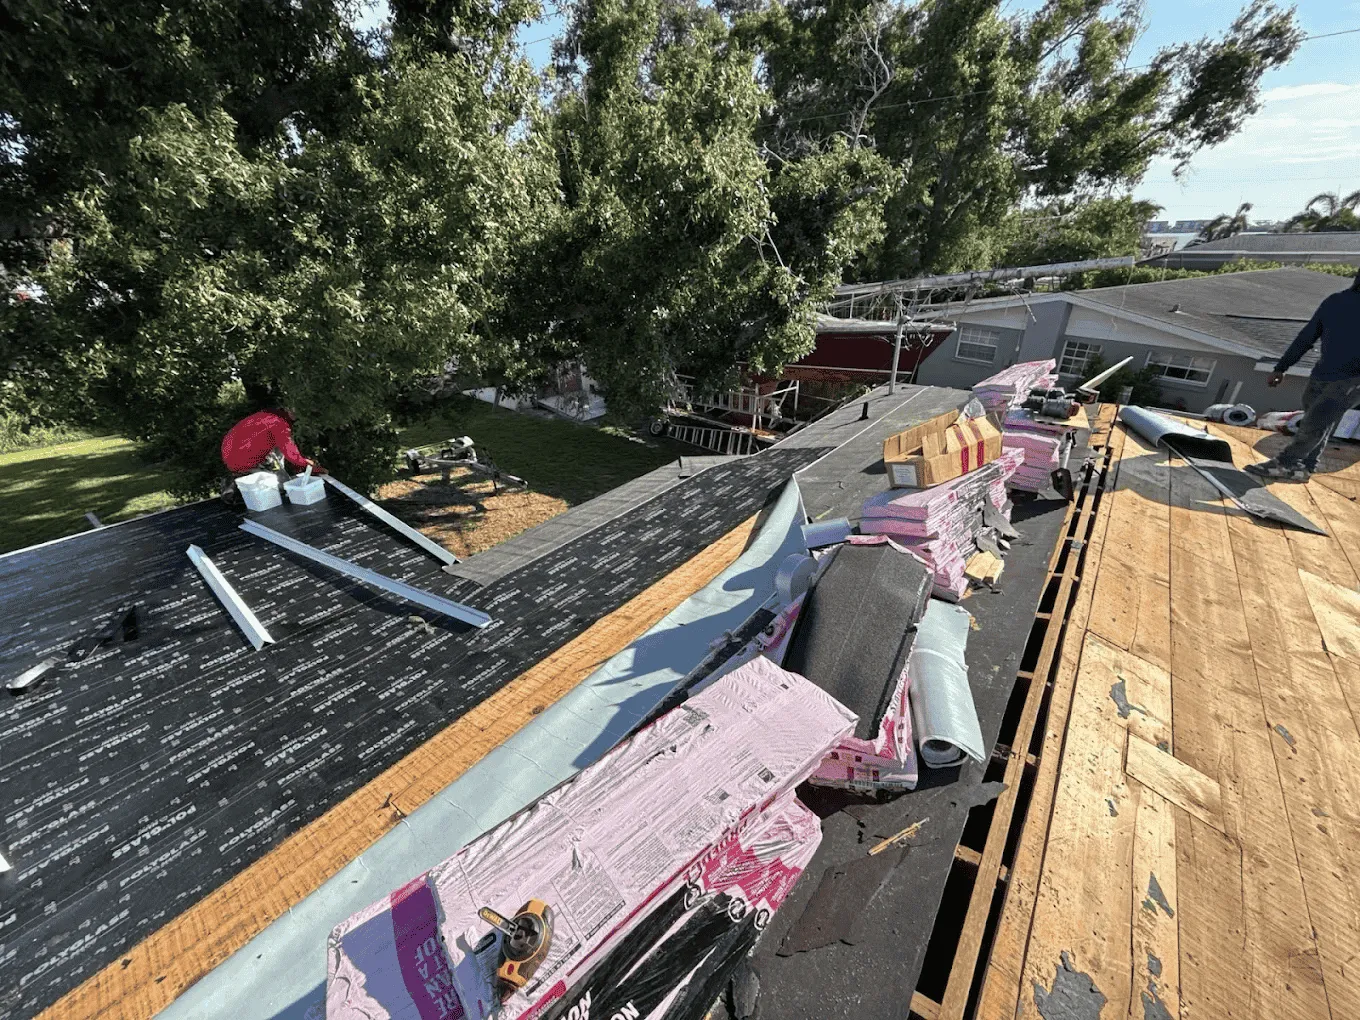
Once preparation is complete and permits are in hand, installation begins with removal of the existing roofing system — a full tear-off, down to the deck. In Florida, especially when upgrading a roof or installing a different roofing type, a tear-off ensures that the old materials — shingles or tiles, underlayment, flashing — are removed, giving access to the decking below for inspection and repair if needed.
Roofers begin by laying tarps or protective coverings to shield landscaping, walkways, and driveways from falling debris and nails. A dumpster or debris container is often placed to collect old materials for safe disposal. As the crew works, they carefully remove shingles or tiles, underlayment, flashing, and any decayed or damaged components.
Once stripped down to bare wood decking, the team inspects the deck thoroughly. They check for water damage, soft spots, rot, mold, or structural weakening. Any compromised decking boards are replaced or reinforced to ensure the foundation of the new roof is solid. This inspection is critical — without a sound deck, any new roof, no matter how high-quality, could fail prematurely.
Although tear-off can be disruptive — noisy, messy, and sometimes dusty — it is arguably the most important step in preventing long-term problems. Many roofing failures stem from hidden issues in the deck or underlayment that went unaddressed during overlay jobs. For Bradenton homes, a full tear-off is often the only reliable way to ensure integrity.
Building the New Roof: Underlayment, Flashing, Waterproofing & Ventilation
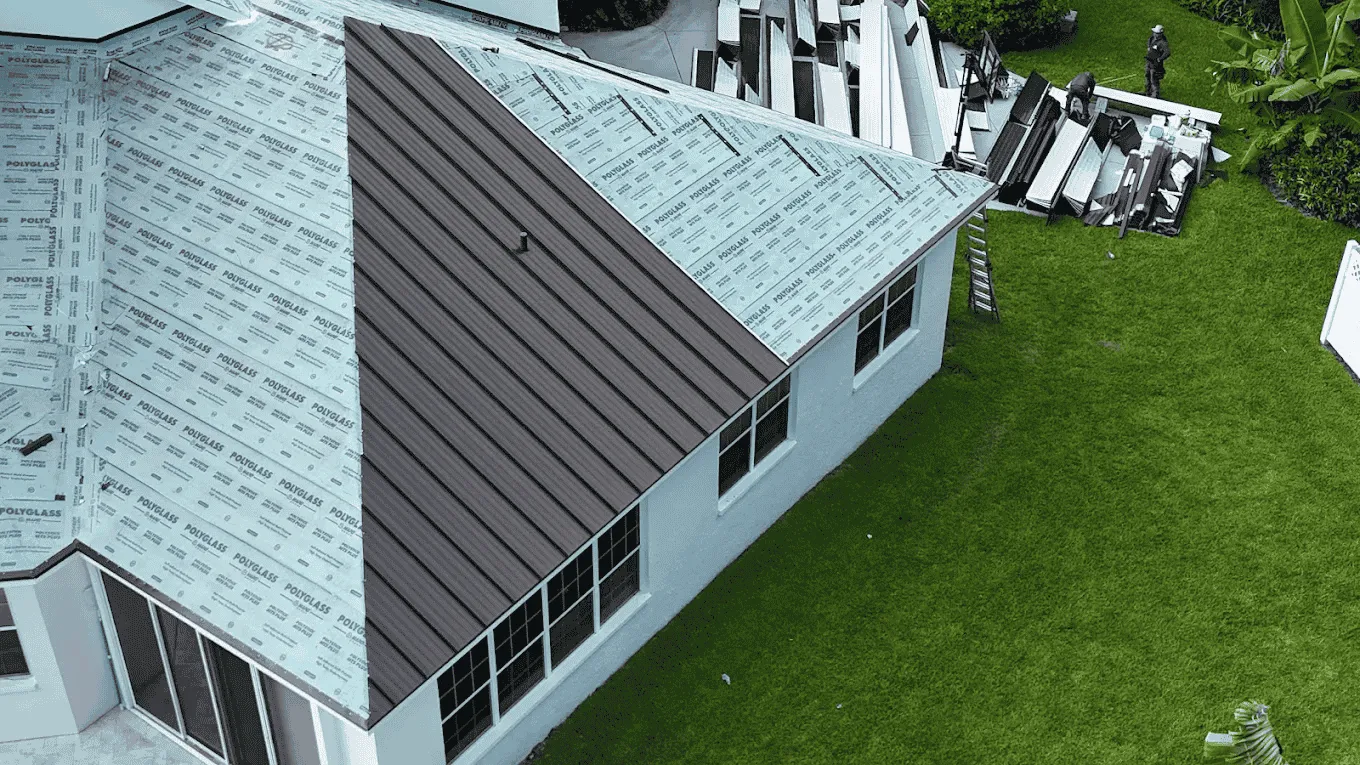
With a clean, solid deck in place, the next phases are all about creating a sealed, hurricane‑ready roofing system. These layers — underlayment, flashing, waterproof barriers, ventilation — are often invisible from the ground, but they’re what will keep your home safe, dry, and structurally sound for decades.
Underlayment & Secondary Waterproof Barrier
The underlayment is the first protective layer laid directly over the roof deck. For Florida homes, particularly in coastal or hurricane‑prone zones, a high-quality underlayment is essential. This typically consists of synthetic or self-adhering membranes designed for water resistance, UV exposure, and wind‑uplift protection. When properly applied, the underlayment acts as a secondary barrier — safeguarding the deck even if the outer roofing material is damaged or tiles are dislodged.
Installation demands accuracy: overlapping layers, sealing seams, and ensuring edges and valleys are properly covered. For higher-wind zones, building codes require certain standards for underlayment fastening and sealing to ensure a sealed roof deck capable of resisting uplift, water intrusion, and hurricane‑driven rain.
Flashing, Drip Edges, and Waterproof Seals
After underlayment, metal flashing, drip edges, and waterproof sealing are installed at vulnerable areas: roof edges, eaves, ridges, valleys, around vents, chimneys, skylights, and anywhere that roof planes or walls intersect. These metal and sealant components are critical for redirecting water safely away from the roof surface, preventing leaks and water infiltration during heavy rain or wind‑driven storms.
Valleys — where two roof slopes meet — receive special attention because they channel large volumes of rainwater. In many cases, roofers will install a metal valley liner over a reinforced membrane to ensure water flows correctly and doesn’t seep beneath roofing materials.
Proper Ventilation and Attic Airflow
In Florida’s tropical climate, heat and humidity often accumulate in attic spaces if ventilation is insufficient. Poor ventilation can lead to moisture buildup, mold, rotting wood, and degradation of insulation or structural components. That’s why installing a balanced ventilation system — including soffit vents, ridge vents, or gable vents — is a critical part of the roof installation process. When combined with underlayment, flashing, and proper sealing, ventilation helps regulate attic temperature and moisture, extending the life of the roof and improving comfort and energy efficiency inside the home.
Installing the Final Roof Covering: From Material Selection to Finish
Once the deck, underlayment, flashing, waterproofing, and ventilation are addressed, it’s time for the visible layer — the roofing material itself. The material you choose matters, but equally important is how precisely and professionally it is installed.
Working from the bottom edge of the roof upward, the crew installs roofing material in accordance with manufacturer specs and local building codes. Whether it’s metal panels, tiles, or other roof covering, each piece must be aligned correctly, overlapped properly, fastened securely, and sealed where required.
For metal or tile roofs, this often means using corrosion‑resistant fasteners, clips, or mortar (depending on material), and ensuring all ridges, hips, valleys, and edges are tightly sealed and wind‑rated. For more conventional roofs, underlayment, shingles, or other coverings must be laid in a pattern that ensures water sheds correctly and wind uplift is minimized.
Throughout this phase, quality control is vital. Installers should check alignment, fastening integrity, sealing quality, and consistency across all roof sections. Any deviations, improper overlaps or misaligned panels can become failures later — under heavy wind, rain, or UV stress.
Cleanup, Final Walk‑Through, and Building Department Inspection
With the new roof in place, the final phase involves cleanup, inspection, and homeowner handoff — an often overlooked but essential part of the project.
Roof installation is a messy business. Old roofing, nails, flashing, underlayment, packaging, and debris must be removed carefully. Crews should collect and dispose of all debris properly, sweep up nails, fasteners, and shards, and protect landscaping, driveways, and walkways. Magnetic nail-bugs and tarps are commonly used to ensure no stray nails are left behind — a safety precaution every homeowner should expect.
After cleanup, the roofing contractor should conduct a final walk‑through with you. This involves showing you the completed roof, explaining what was installed, pointing out flashing, ventilation, and other critical components, and making sure you are satisfied with workmanship and appearance. This is also the time to collect warranties, documentation, and any paperwork tied to permits or building code compliance.
Finally, a formal inspection by the local building department (or code enforcement entity) should verify that the work meets all required standards — underlayment, fastening, wind ratings, ventilation, and structural integrity. Once passed, your new roof is officially certified.
Typical Timeline: What to Expect and How Long It Takes
The timeframe for a roof installation varies depending on the size and complexity of your home, the roofing material chosen, the need for decking repairs, and weather conditions.
For a standard single‑story home with a straightforward roof layout, tear-off typically takes 1–2 days. Underlayment, flashing, and under‑roof prep may take another half‑day to a full day. Installing the final roof covering—whether metal, tile, or other material—generally adds a full day or more, depending on complexity and weather. Cleanup, final walkthrough, and securing inspection often consume an additional half‑day.
In total, a typical roof installation can take about 2 to 5 days from start to finish. For larger homes, steep roofs, or projects requiring structural repairs, expect more time — sometimes up to a week or more. A skilled roofing crew will build in buffer time for unpredictable Florida weather, delays in materials, and final inspection scheduling.
How Homeowners Should Prepare — Tips for a Smooth Installation
As a homeowner, you play an important role in ensuring the process goes smoothly. Here’s how you can help before and during installation:
First, clear the work area. Move vehicles, boats, patio furniture, garden items, and any fragile outdoor belongings away from the house. This prevents accidental damage from falling debris and gives roof crews sufficient working space.
Inside the home, consider protecting or relocating delicate items. Vibrations from tear-off, hammering, and general work overhead can cause objects to shift or fall. If you have pets or small children, you may choose to keep them safe off‑site during the more disruptive phases.
Understand that noise, dust, and disruption are part of the process — especially during tear‑off and installation. Communicate with your roofing company about expected work hours and plan accordingly.
Finally, plan to attend the final walkthrough. This is your chance to inspect workmanship, learn about ventilation, flashing, and underlayment details, and collect documentation: warranties, codes compliance, and maintenance recommendations.
Why Doing It Right Matters — Especially in Bradenton
You might be tempted to save money by overlaying a new roof over an old one or using the lowest-cost materials. But in Bradenton’s coastal climate — salt air, hurricanes, strong winds, heavy rain, high humidity, and intense sun — cutting corners almost always leads to problems over time.
Overlaying hides potential structural or deck damage; it often violates code for new roof systems; it reduces the ability to inspect and repair underlying issues; and it can trap moisture, resulting in rot, leaks, and structural decay.
Similarly, skimping on underlayment, flashing, or ventilation might save upfront dollars — but it dramatically reduces the roof’s ability to resist wind uplift, water intrusion, or mold and moisture damage. What may start as a “save” often ends as a costly repair.
By doing the job right — full tear-off, deck inspection, high‑quality underlayment, proper flashing and ventilation, code‑compliant installation, and thorough cleanup — you’re building more than a roof. You’re building a long-term shelter designed for decades of Florida sun, salt, storms, and seasonal changes.
What to Ask Your Roofing Contractor — A Homeowner’s Pre‑Installation Checklist
Before signing any contract, make sure your contractor can clearly answer:
- Will the old roof be fully removed (full tear‑off) down to the decking?
- What underlayment system and waterproof barrier will be used — and is it rated for coastal/hurricane conditions?
- Are flashing, drip edges, valleys, and roof penetrations part of the installation plan — or “extra”?
- How will attic ventilation be handled? What vents and airflow system will be installed?
- If decking boards need repair or replacement, how will that be managed and documented?
- What is the estimated timeline from start to finish, and how are weather delays handled?
- How will debris, nails, and old materials be disposed of? Do they use tarps and nail‑removal tools?
- Is there a final walkthrough with the homeowner and will the work be inspected for code compliance?
- What warranties or guarantees cover workmanship and materials — and what maintenance is required to keep those warranties valid?
Asking these questions ensures transparency, sets expectations, and helps avoid surprises once work begins.
A Roof Installation Is an Investment in Long-Term Protection
For Bradenton homeowners, a new roof isn’t a cosmetic upgrade — it’s a long-term investment in safety, comfort, energy efficiency, and peace of mind. Given the demands of coastal Florida weather — storms, hurricanes, heat, salt air, and rain — a proper roof installation becomes the foundation for decades of protection.
When done correctly — with full tear-off, quality materials, sealed underlayment, proper flashing, ventilation, and a professional, code‑compliant installation — a roof becomes more than a cover: it becomes your home’s shield. It’s not just about how the roof looks — it’s about how it performs under rain, wind, heat, and time.
Taking shortcuts may save money upfront, but it often leads to problems later. A well-installed roof today can protect your home for decades, avoid costly repairs, and even improve energy efficiency.
If you’re considering a roof installation soon, treat it as the comprehensive project it should be. Work with experienced local professionals who understand coastal roofing demands, follow best practices, use proper materials, and provide clear documentation.
With the right installation, your new roof can deliver security, reliability, and value for a lifetime.